Picking in IL/CL View (Polygon)
This lesson describes steps to pick a polygon on an IL/CL section in theIL/CL VIew.
Pick polygon points in IL/CL View
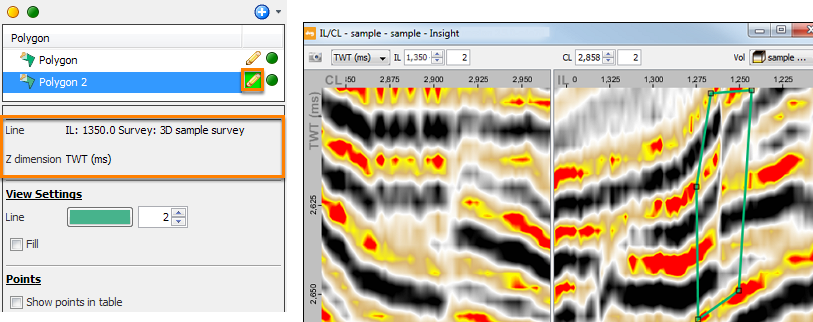
- Create a polygon as explained in Creating a Polygon.
- At the polygon item row, click the Pick polygon pencil icon to enable the picking mode. This icon will be disabled if you are not the owner of the polygon (seeMulti-user Considerations).
- In the IL/CL View, make sure you are at the IL/CL and time/depth domain that you wish to create the polygon. Adjust the IL/CL and domain by changing the values in the Navigation Bar in the IL/CL View.
- In the section view, click to define the perimeter of the polygon. Right-click to finish picking.
- Right-click an existing point to delete it.
- To move an existing point, click the point and click on a new location to place the point there.
- To add a new point from the point you have just moved, continue to click at another location to place the new polygon point.
- Right-click to end picking the points.
- To add a new shape to the existing polygon product, click at a new location and begin picking.
- To move a polygon, press Shift and click inside the shape to drag it to a new location
- To exit the picking mode, click the Pick polygon pencil icon. Alternatively, double-click or press Esc to disable polygon picking in theIL/CL View.
- At any time during your session, you can edit or delete polygon points or shapes by enabling picking mode or by changing the coordinates in the Details Panel (see Editing a Polygon).
The line and survey on which the polygon has been defined will be displayed in the polygon Details Panel.However, unlike a time-/depth-slice polygon, these cannot be changed.