Custom Map Annotations
Note: Lines and rectangular annotations can be exported as culture files (see Export straight-line annotations below).
Hand-drawn annotation in Map View
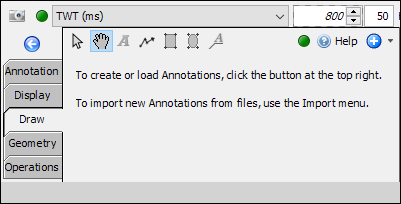
Add simple text and drawings to the map view in your session.
- In Map View, open the Draw tab on the left panel.
- Click the annotation icon to use.
- Select
 : Use to select text, drawing and shapes on the map.
 - Pan
 : Click and hold on the map to pan the view.
 - Text
 : Create a text box on the map. Text boxes can contain any multi-line text, in a selected font and style.
 - Line
 : Create multi-point lines on the map. Multi-point lines can be added similarly to Arblines.
 - Rectangle
 : Create a rectangle shape on the map.
 - Oval
 : Create an oval shape on the map.
 - Callout
 : Create an callout on the map.
- Select
Note: Rectangles and ovals (ellipses) can be added by picking the first corner and then the opposite corner. While dragging a point on a line, rectangle or oval, the drag can be modified by holding the shift key:
- Line segments will be constrained to 45 degree angles.
- Rectangles and ovals will be constrained to square proportions.
- A new annotation will be created under a default folder called Map in the Annotation tree. Both the folder and the new annotation can be renamed by double clicking the items in the tree.
New text box
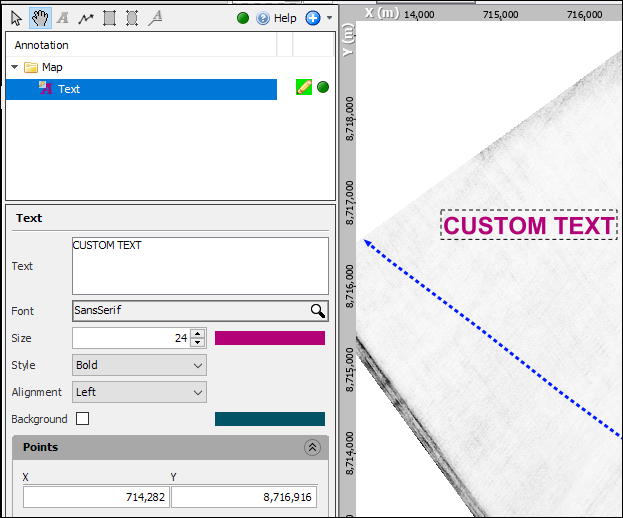
- Select and click the text box icon to create a custom text box.
- The Pick Annotation pencil icon will automatically be enabled. Click anywhere in the map to insert a text box.
- Double click or press Esc to disable picking mode.
- In the Details Panel of the text box, type the text in the Text field.
- At Font, choose the font and font size of the text.
- At Style, choose the emphasis to put on the text (i.e. bold, italics) and pick a font colour by clicking on the adjacent colourbar.
- Define the Alignment of the text inside the text box.
- Select the Background checkbox and pick a colour from the colourbar to fill the check box with colour.
- To move the text box to another location, click the Pick Annotation pencil icon and drag the box in the viewer.
- Alternatively, right click the text in the map view and select Pick Text.
- A third option is to change the X and Y points in the Points section of the Details Panel.
Tip: For more colour options, click on the button ( >> ) at the bottom of the colour popup box to open the Select Colour window. You can also adjust the Opacity by moving the slider on the right.
New line
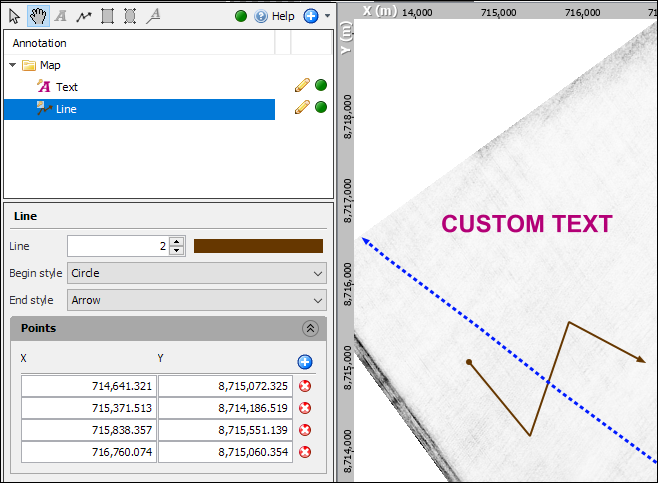
- Select and click the line icon to create a custom line.
- The Pick Annotation pencil icon will automatically be enabled. Click anywhere in the map to pick the points in the line.
- If you make a mistake, right click on a point to remove it.
- Double click or press Esc to disable picking mode.
- In the Details Panel of the line, define the thickness and colour of the line.
- At Begin style, choose the type of icon to represent the first point.
- At End style, choose the type of icon to represent the last point.
- To move the points of the line to another location, click the Pick Annotation pencil icon, click on the point and click on a new location.
- Alternatively, right click the line in the map view and select Pick Line.
- A third option is to change the X and Y points in the Points section of the Details Panel.
Tip: For more colour options, click on the button ( > > ) at the bottom of the colour popup box to open the Select Colour window. You can also adjust the Opacity by moving the slider on the right.
New rectangle
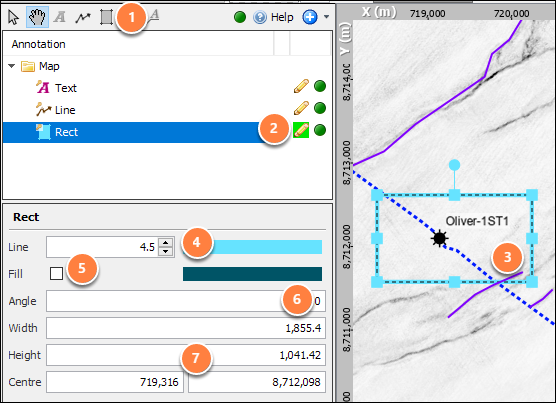
- Select and click the rectangle icon to create a custom rectangle.
- The Pick Annotation pencil icon will automatically be enabled. Click anywhere in the map to pick the points. Only two points are needed to define the rectangle.
- Double click or press Esc to disable picking mode.
- In the Details Panel of the rectangle, define the line thickness and colour of the rectangle's border.
- Select the Fill check box and pick a colour from the adjacent colour bar to fill the oval with the desired colour.
- Set the angle to rotate the created oval.
- To move the points of the oval to another location, click the Pick Annotation pencil icon, click on the point and click on a new location.
- Alternatively, right click the oval in the map view and select Pick Rect.
- A third option is to change the Width, Height and Centre in the Details Panel.
Tip: For more colour options, click on the button ( > > ) at the bottom of the colour popup box to open the Select Colour window. You can also adjust the Opacity by moving the slider on the right.
New oval
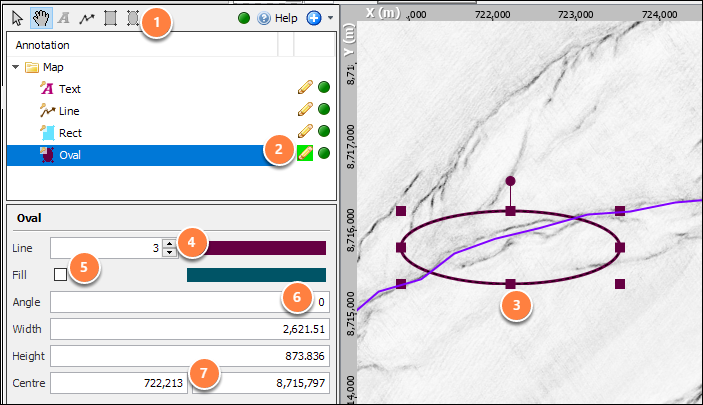
- Select and click the oval icon to create a custom oval.
- The Pick Annotation pencil icon will automatically be enabled. Click anywhere in the map to pick the points. Only two points are needed to define the oval.
- Double click or press Esc to disable picking mode.
- In the Details Panel of the oval, define the line thickness and colour of the oval's border.
- Select the Fill check box and pick a colour from the adjacent colour bar to fill the oval with the desired colour.
- Set the angle to rotate the created oval.
- To move the points of the oval to another location, click the Pick Annotation pencil icon, click on the point and click on a new location.
- Alternatively, right click the oval in the map view and select Pick Oval.
- A third option is to change the Width, Height and Centre in the Details Panel.
Tip: For more colour options, click on the button ( >> ) at the bottom of the colour popup box to open the Select Colour window. You can also adjust the Opacity by moving the slider on the right.
New callout
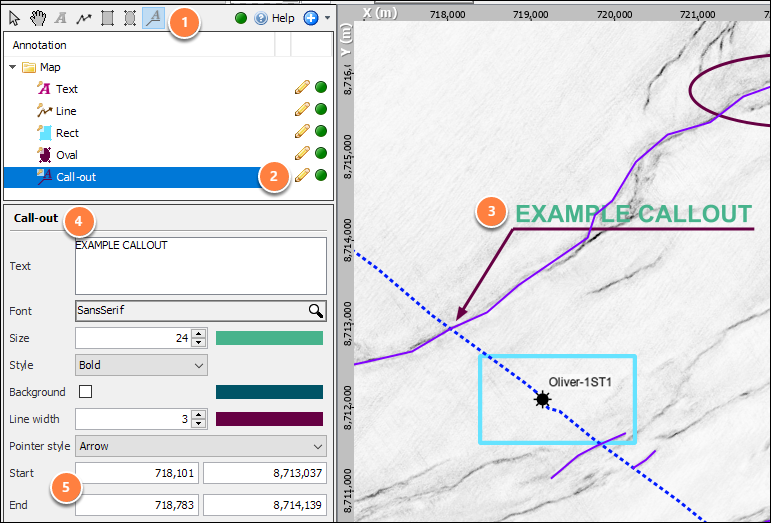
- Select and click the text callout icon to create a custom text callout.
- The Pick Annotation pencil icon will automatically be enabled. Click a location on the map view as the point for the callout and drag to the area where the callout text should appear.
- Double click or press Esc to disable picking mode.
- In the Details Panel,
- Text: Type the text for the selected callout annotation.
- Font and Style: Adjust the font type, size, style and colour of the callout text.
- Background: Tick to enable the background layer for the text and select the colour.
- Line width: Edit to set the line thickness and select the colour.
- Pointer style: Select the preferred pointer style of either Arrow, Circle or None (no pointer).
- Start / End: Change the X and Y points of the callout pointer and line.
- To move the points of the callout to another location, click the Pick Annotation pencil icon, click on the point and click on a new location.
- Alternatively, right click the callout text in the map view and select Pick Callout.
- A third option is to change the X and Y points in the Start / End section of the Details Panel.
Tip: For more colour options, click on the button ( > > ) at the bottom of the colour popup box to open the Select Colour window. You can also adjust the Opacity by moving the slider on the right.
Editing annotations
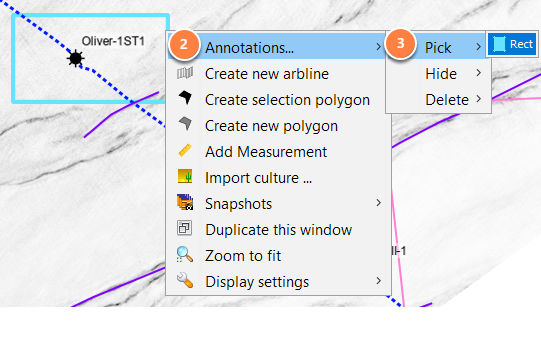
- Annotations can be edited by selecting the preferred annotation and change the configuration in the Details Panel.
- To pick, hide or delete an existing annotation, right-click on an existing annotation on the Map View.
- From the context menu, select Annotations... and choose Pick, Hide or Delete.
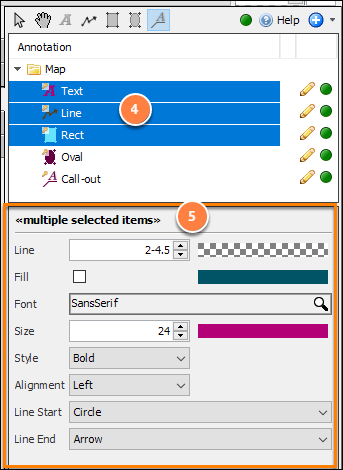
- To edit multiple annotations, select several items from the annotation table. You can click the folder icon to select all items.
- In the Details Panel,
- Line: Adjust the line thickness and colour.
- Fill: Enable/disable fill and change the colour.
- Font and Style: Adjust the font type, size, style and colour.
- Alignment: Define the alignment of the text.
- Line Start/End: Change the type of icon to represent the first point and last point.
Export straight-line annotations
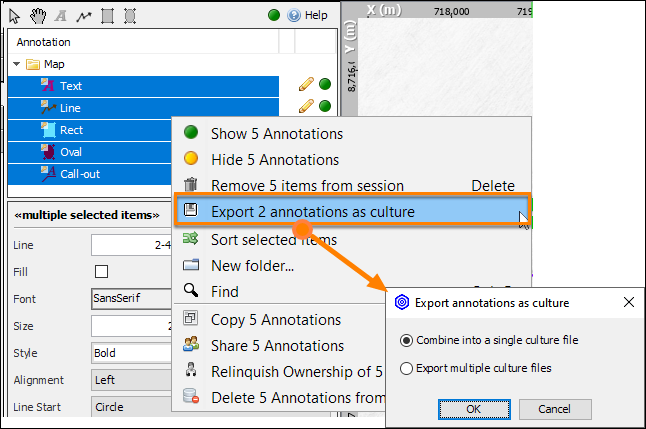
Hand-drawn Line and Rectangle annotations can be exported as culture files (.duculture format).
- Right click on the annotation in the Draw tab and select Export 'Annotation'. Multiple annotations can be exported at the same time into a single .duculture file or into multiple .duculture files.
- Type a name for the culture file and browse to your desired saved location.
- Click Save.
Note: The Export option is only visible if a compatible annotation type is selected (line or rectangle).
Once exported, the culture files can be imported into Insight (see How do I import a Culture file?).
Copy Annotations
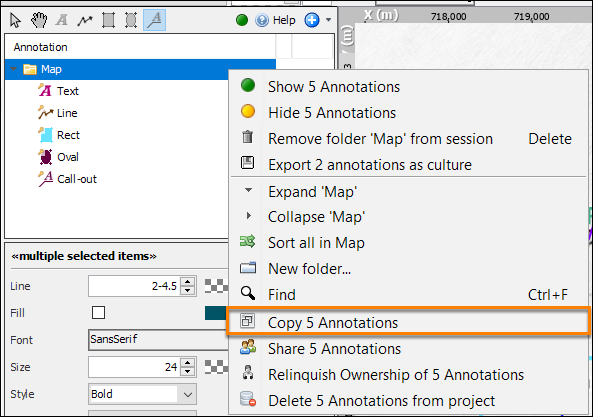
- Right-click on an annotation in the Draw tab and select Copy 'Annotation'. Multiple annotations can be selected and copied at the same time. You can right-click the folder icon and select Copy 'X' Annotations to copy all items.
- On the pop-up Rename Copy window, type a name for the copied annotations.
Sharing Annotations
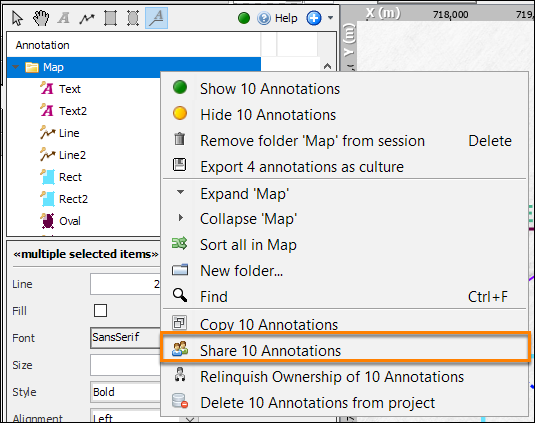
Annotations are saved in the project and can be shared with other users and sessions.
- Right-click on an annotation in the Draw tab and select Share 'Annotation'. Multiple annotations can be selected and shared at the same time. You can[SW-35729] right-click the folder icon and select Share 'X' Annotations to share all items.
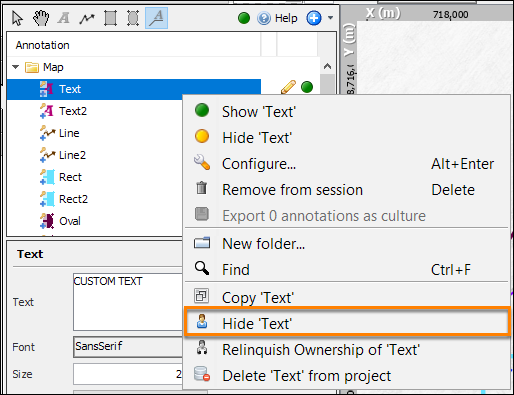
- You can decide to not share an annotation by right-clicking the annotation and selecting Hide 'Annotation'.
Loading Shared Annotations into a Session
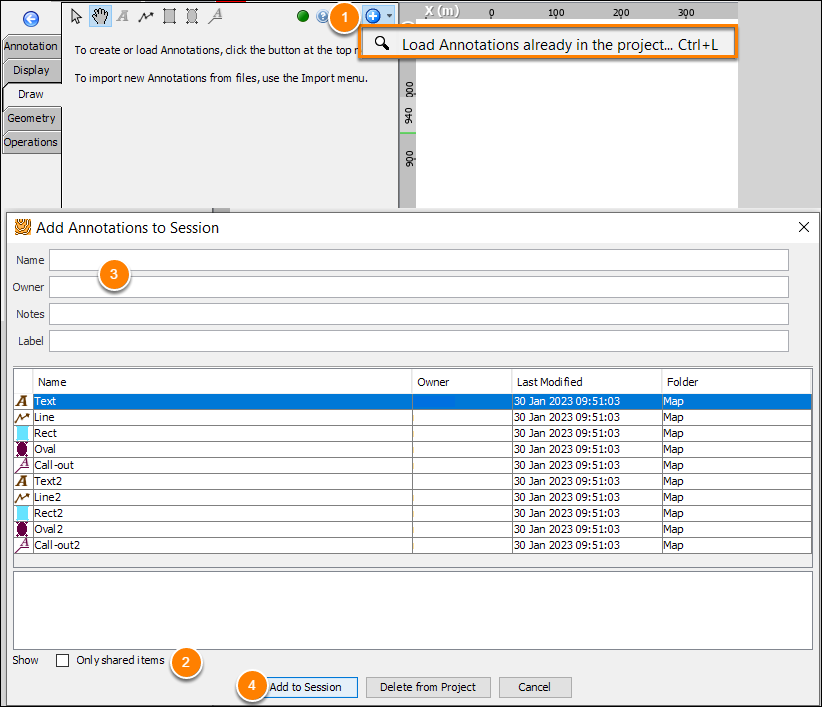
- At the Draw tab header, click the + icon at the top right, and select Load Annotations Already in the project. The Add Annotations to Session window will be displayed.
- All the annotations that have been saved in the project database will be displayed in this window. By default, the search dialog will show all items owned by everyone, shared or not. To only show items that you own or items marked as shared, select the Only show shared items check-box at the bottom left of the window (see Multi-user Considerations).
- If there are many items in the project database, you can quickly search for the desired items. Typing in the Name, Owner, Notes and/or Label boxes will limit the display to items that match the text. In the table that displays the search results, select an item or multiple items that you want to add to the session.
- The Add to Session button will be enabled. Click this to add the selected item(s) to the current session.